


More on Entrepreneurship/Creators

Aaron Dinin, PhD
3 years ago
I'll Never Forget the Day a Venture Capitalist Made Me Feel Like a Dunce
Are you an idiot at fundraising?

Humans undervalue what they don't grasp. Consider NASCAR. How is that a sport? ask uneducated observers. Circular traffic. Driving near a car's physical limits is different from daily driving. When driving at 200 mph, seemingly simple things like changing gas weight or asphalt temperature might be life-or-death.
Venture investors do something similar in entrepreneurship. Most entrepreneurs don't realize how complex venture finance is.
In my early startup days, I didn't comprehend venture capital's intricacy. I thought VCs were rich folks looking for the next Mark Zuckerberg. I was meant to be a sleek, enthusiastic young entrepreneur who could razzle-dazzle investors.
Finally, one of the VCs I was trying to woo set me straight. He insulted me.
How I learned that I was approaching the wrong investor
I was constructing a consumer-facing, pre-revenue marketplace firm. I looked for investors in my old university's alumni database. My city had one. After some research, I learned he was a partner at a growth-stage, energy-focused VC company with billions under management.
Billions? I thought. Surely he can write a million-dollar cheque. He'd hardly notice.
I emailed the VC about our shared alumni status, explaining that I was building a startup in the area and wanted advice. When he agreed to meet the next week, I prepared my pitch deck.
First error.
The meeting seemed like a funding request. Imagine the awkwardness.
His assistant walked me to the firm's conference room and told me her boss was running late. While waiting, I prepared my pitch. I connected my computer to the projector, queued up my PowerPoint slides, and waited for the VC.
He didn't say hello or apologize when he entered a few minutes later. What are you doing?
Hi! I said, Confused but confident. Dinin Aaron. My startup's pitch.
Who? Suspicious, he replied. Your email says otherwise. You wanted help.
I said, "Isn't that a euphemism for contacting investors?" Fundraising I figured I should pitch you.
As he sat down, he smiled and said, "Put away your computer." You need to study venture capital.
Recognizing the business aspects of venture capital
The VC taught me venture capital in an hour. Young entrepreneur me needed this lesson. I assume you need it, so I'm sharing it.
Most people view venture money from an entrepreneur's perspective, he said. They envision a world where venture capital serves entrepreneurs and startups.
As my VC indicated, VCs perceive their work differently. Venture investors don't serve entrepreneurs. Instead, they run businesses. Their product doesn't look like most products. Instead, the VCs you're proposing have recognized an undervalued market segment. By investing in undervalued companies, they hope to profit. It's their investment thesis.
Your company doesn't fit my investment thesis, the venture capitalist told me. Your pitch won't beat my investing theory. I invest in multimillion-dollar clean energy companies. Asking me to invest in you is like ordering a breakfast burrito at a fancy steakhouse. They could, but why? They don't do that.
Yeah, I’m not a fine steak yet, I laughed, feeling like a fool for pitching a growth-stage VC used to looking at energy businesses with millions in revenues on my pre-revenue, consumer startup.
He stressed that it's not necessary. There are investors targeting your company. Not me. Find investors and pitch them.
Remember this when fundraising. Your investors aren't philanthropists who want to help entrepreneurs realize their company goals. Venture capital is a sophisticated investment strategy, and VC firm managers are industry experts. They're looking for companies that meet their investment criteria. As a young entrepreneur, I didn't grasp this, which is why I struggled to raise money. In retrospect, I probably seemed like an idiot. Hopefully, you won't after reading this.

Jenn Leach
3 years ago
What TikTok Paid Me in 2021 with 100,000 Followers
I thought it would be interesting to share how much TikTok paid me in 2021.
Onward!
Oh, you get paid by TikTok?
Yes.
They compensate thousands of creators. My Tik Tok account
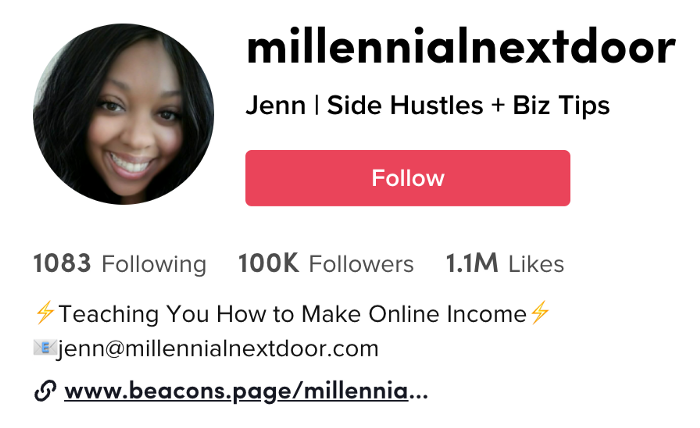
I launched my account in March 2020 and generally post about money, finance, and side hustles.
TikTok creators are paid in several ways.
Fund for TikTok creators
Sponsorships (aka brand deals)
Affiliate promotion
My own creations
Only one, the TikTok Creator Fund, pays me.
The TikTok Creator Fund: What Is It?
TikTok's initiative pays creators.
YouTube's Shorts Fund, Snapchat Spotlight, and other platforms have similar programs.
Creator Fund doesn't pay everyone. Some prerequisites are:
age requirement of at least 18 years
In the past 30 days, there must have been 100,000 views.
a minimum of 10,000 followers
If you qualify, you can apply using your TikTok account, and once accepted, your videos can earn money.
My earnings from the TikTok Creator Fund
Since 2020, I've made $273.65. My 2021 payment is $77.36.
Yikes!
I made between $4.91 to around $13 payout each time I got paid.
TikTok reportedly pays 3 to 5 cents per thousand views.
To live off the Creator Fund, you'd need billions of monthly views.
Top personal finance creator Sara Finance has millions (if not billions) of views and over 700,000 followers yet only received $3,000 from the TikTok Creator Fund.
Goals for 2022
TikTok pays me in different ways, as listed above.
My largest TikTok account isn't my only one.
In 2022, I'll revamp my channel.
It's been a tumultuous year on TikTok for my account, from getting shadow-banned to being banned from the Creator Fund to being accepted back (not at my wish).
What I've experienced isn't rare. I've read about other creators' experiences.
So, some quick goals for this account…
200,000 fans by the year 2023
Consistent monthly income of $5,000
two brand deals each month
For now, that's all.
Benjamin Lin
3 years ago
I sold my side project for $20,000: 6 lessons I learned
How I monetized and sold an abandoned side project for $20,000
The Origin Story
I've always wanted to be an entrepreneur but never succeeded. I often had business ideas, made a landing page, and told my buddies. Never got customers.
In April 2021, I decided to try again with a new strategy. I noticed that I had trouble acquiring an initial set of customers, so I wanted to start by acquiring a product that had a small user base that I could grow.
I found a SaaS marketplace called MicroAcquire.com where you could buy and sell SaaS products. I liked Shareit.video, an online Loom-like screen recorder.
Shareit.video didn't generate revenue, but 50 people visited daily to record screencasts.
Purchasing a Failed Side Project
I eventually bought Shareit.video for $12,000 from its owner.
$12,000 was probably too much for a website without revenue or registered users.
I thought time was most important. I could have recreated the website, but it would take months. $12,000 would give me an organized code base and a working product with a few users to monetize.
I considered buying a screen recording website and trying to grow it versus buying a new car or investing in crypto with the $12K.
Buying the website would make me a real entrepreneur, which I wanted more than anything.
Putting down so much money would force me to commit to the project and prevent me from quitting too soon.
A Year of Development
I rebranded the website to be called RecordJoy and worked on it with my cousin for about a year. Within a year, we made $5000 and had 3000 users.
We spent $3500 on ads, hosting, and software to run the business.
AppSumo promoted our $120 Life Time Deal in exchange for 30% of the revenue.
We put RecordJoy on maintenance mode after 6 months because we couldn't find a scalable user acquisition channel.
We improved SEO and redesigned our landing page, but nothing worked.

Despite not being able to grow RecordJoy any further, I had already learned so much from working on the project so I was fine with putting it on maintenance mode. RecordJoy still made $500 a month, which was great lunch money.
Getting Taken Over
One of our customers emailed me asking for some feature requests and I replied that we weren’t going to add any more features in the near future. They asked if we'd sell.
We got on a call with the customer and I asked if he would be interested in buying RecordJoy for 15k. The customer wanted around $8k but would consider it.
Since we were negotiating with one buyer, we put RecordJoy on MicroAcquire to see if there were other offers.
We quickly received 10+ offers. We got 18.5k. There was also about $1000 in AppSumo that we could not withdraw, so we agreed to transfer that over for $600 since about 40% of our sales on AppSumo usually end up being refunded.
Lessons Learned
First, create an acquisition channel
We couldn't discover a scalable acquisition route for RecordJoy. If I had to start another project, I'd develop a robust acquisition channel first. It might be LinkedIn, Medium, or YouTube.
Purchase Power of the Buyer Affects Acquisition Price
Some of the buyers we spoke to were individuals looking to buy side projects, as well as companies looking to launch a new product category. Individual buyers had less budgets than organizations.
Customers of AppSumo vary.
AppSumo customers value lifetime deals and low prices, which may not be a good way to build a business with recurring revenue. Designed for AppSumo users, your product may not connect with other users.
Try to increase acquisition trust
Acquisition often fails. The buyer can go cold feet, cease communicating, or run away with your stuff. Trusting the buyer ensures a smooth asset exchange. First acquisition meeting was unpleasant and price negotiation was tight. In later meetings, we spent the first few minutes trying to get to know the buyer’s motivations and background before jumping into the negotiation, which helped build trust.
Operating expenses can reduce your earnings.
Monitor operating costs. We were really happy when we withdrew the $5000 we made from AppSumo and Stripe until we realized that we had spent $3500 in operating fees. Spend money on software and consultants to help you understand what to build.
Don't overspend on advertising
We invested $1500 on Google Ads but made little money. For a side project, it’s better to focus on organic traffic from SEO rather than paid ads unless you know your ads are going to have a positive ROI.
You might also like

Charlie Brown
3 years ago
What Happens When You Sell Your House, Never Buying It Again, Reverse the American Dream
Homeownership isn't the only life pattern.
Want to irritate people?
My party trick is to say I used to own a house but no longer do.
I no longer wish to own a home, not because I lost it or because I'm moving.
It was a long-term plan. It was more deliberate than buying a home. Many people are committed for this reason.
Poppycock.
Anyone who told me that owning a house (or striving to do so) is a must is wrong.
Because, URGH.
One pattern for life is to own a home, but there are millions of others.
You can afford to buy a home? Go, buddy.
You think you need 1,000 square feet (or more)? You think it's non-negotiable in life?
Nope.
It's insane that society forces everyone to own real estate, regardless of income, wants, requirements, or situation. As if this trade brings happiness, stability, and contentment.
Take it from someone who thought this for years: drywall isn't happy. Living your way brings contentment.
That's in real estate. It may also be renting a small apartment in a city that makes your soul sing, but you can't afford the downpayment or mortgage payments.
Living or traveling abroad is difficult when your life savings are connected to something that eats your money the moment you sign.
#vanlife, which seems like torment to me, makes some people feel alive.
I've seen co-living, vacation rental after holiday rental, living with family, and more work.
Insisting that home ownership is the only path in life is foolish and reduces alternative options.
How little we question homeownership is a disgrace.
No one challenges a homebuyer's motives. We congratulate them, then that's it.
When you offload one, you must answer every question, even if you have a loose screw.
Why do you want to sell?
Do you have any concerns about leaving the market?
Why would you want to renounce what everyone strives for?
Why would you want to abandon a beautiful place like that?
Why would you mismanage your cash in such a way?
But surely it's only temporary? RIGHT??
Incorrect questions. Buying a property requires several inquiries.
The typical American has $4500 saved up. When something goes wrong with the house (not if, it’s never if), can you actually afford the repairs?
Are you certain that you can examine a home in less than 15 minutes before committing to buying it outright and promising to pay more than twice the asking price on a 30-year 7% mortgage?
Are you certain you're ready to leave behind friends, family, and the services you depend on in order to acquire something?
Have you thought about the connotation that moving to a suburb, which more than half of Americans do, means you will be dependent on a car for the rest of your life?
Plus:
Are you sure you want to prioritize home ownership over debt, employment, travel, raising kids, and daily routines?
Homeownership entails that. This ex-homeowner says it will rule your life from the time you put the key in the door.
This isn't questioned. We don't question enough. The holy home-ownership grail was set long ago, and we don't challenge it.
Many people question after signing the deeds. 70% of homeowners had at least one regret about buying a property, including the expense.
Exactly. Tragic.
Homes are different from houses
We've been fooled into thinking home ownership will make us happy.
Some may agree. No one.
Bricks and brick hindered me from living the version of my life that made me most comfortable, happy, and steady.
I'm spending the next month in a modest apartment in southern Spain. Even though it's late November, today will be 68 degrees. My spouse and I will soon meet his visiting parents. We'll visit a Sherry store. We'll eat, nap, walk, and drink Sherry. Writing. Jerez means flamenco.
That's my home. This is such a privilege. Living a fulfilling life brings me the contentment that buying a home never did.
I'm happy and comfortable knowing I can make almost all of my days good. Rejecting home ownership is partly to blame.
I'm broke like most folks. I had to choose between home ownership and comfort. I said, I didn't find them together.
Feeling at home trumps owning brick-and-mortar every day.
The following is the reality of what it's like to turn the American Dream around.
Leaving the housing market.
Sometimes I wish I owned a home.
I miss having my own yard and bed. My kitchen, cookbooks, and pizza oven are missed.
But I rarely do.
Someone else's life plan pushed home ownership on me. I'm grateful I figured it out at 35. Many take much longer, and some never understand homeownership stinks (for them).
It's confusing. People will think you're dumb or suicidal.
If you read what I write, you'll know. You'll realize that all you've done is choose to live intentionally. Find a home beyond four walls and a picket fence.
Miss? As I said, they're not home. If it were, a pizza oven, a good mattress, and a well-stocked kitchen would bring happiness.
No.
If you can afford a house and desire one, more power to you.
There are other ways to discover home. Find calm and happiness. For fun.
For it, look deeper than your home's foundation.

Stephen Moore
3 years ago
A Meta-Reversal: Zuckerberg's $71 Billion Loss
The company's epidemic gains are gone.
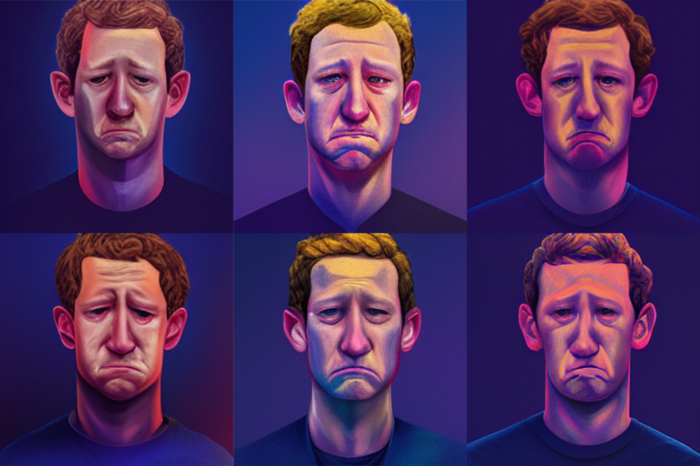
Mark Zuckerberg was in line behind Jeff Bezos and Bill Gates less than two years ago. His wealth soared to $142 billion. Facebook's shares reached $382 in September 2021.
What comes next is either the start of something truly innovative or the beginning of an epic rise and fall story.
In order to start over (and avoid Facebook's PR issues), he renamed the firm Meta. Along with the new logo, he announced a turn into unexplored territory, the Metaverse, as the next chapter for the internet after mobile. Or, Zuckerberg believed Facebook's death was near, so he decided to build a bigger, better, cooler ship. Then we saw his vision (read: dystopian nightmare) in a polished demo that showed Zuckerberg in a luxury home and on a spaceship with aliens. Initially, it looked entertaining. A problem was obvious, though. He might claim this was the future and show us using the Metaverse for business, play, and more, but when I took off my headset, I'd realize none of it was genuine.
The stock price is almost as low as January 2019, when Facebook was dealing with the aftermath of the Cambridge Analytica crisis.
Irony surrounded the technology's aim. Zuckerberg says the Metaverse connects people. Despite some potential uses, this is another step away from physical touch with people. Metaverse worlds can cause melancholy, addiction, and mental illness. But forget all the cool stuff you can't afford. (It may be too expensive online, too.)
Metaverse activity slowed for a while. In early February 2022, we got an earnings call update. Not good. Reality Labs lost $10 billion on Oculus and Zuckerberg's Metaverse. Zuckerberg expects losses to rise. Meta's value dropped 20% in 11 minutes after markets closed.
It was a sign of things to come.
The corporation has failed to create interest in Metaverse, and there is evidence the public has lost interest. Meta still relies on Facebook's ad revenue machine, which is also struggling. In July, the company announced a decrease in revenue and missed practically all its forecasts, ending a decade of exceptional growth and relentless revenue. They blamed a dismal advertising demand climate, and Apple's monitoring changes smashed Meta's ad model. Throw in whistleblowers, leaked data revealing the firm knows Instagram negatively affects teens' mental health, the current Capital Hill probe, and the fact TikTok is eating its breakfast, lunch, and dinner, and 2022 might be the corporation's worst year ever.
After a rocky start, tech saw unprecedented growth during the pandemic. It was a tech bubble and then some.
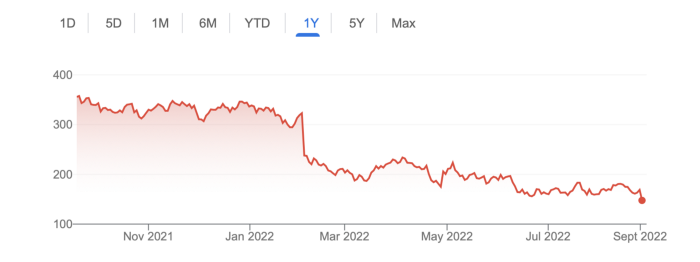
The gains reversed after the dust settled and stock markets adjusted. Meta's year-to-date decline is 60%. Apple Inc is down 14%, Amazon is down 26%, and Alphabet Inc is down 29%. At the time of writing, Facebook's stock price is almost as low as January 2019, when the Cambridge Analytica scandal broke. Zuckerberg owns 350 million Meta shares. This drop costs him $71 billion.
The company's problems are growing, and solutions won't be easy.
Facebook's period of unabated expansion and exorbitant ad revenue is ended, and the company's impact is dwindling as it continues to be the program that only your parents use. Because of the decreased ad spending and stagnant user growth, Zuckerberg will have less time to create his vision for the Metaverse because of the declining stock value and decreasing ad spending.
Instagram is progressively dying in its attempt to resemble TikTok, alienating its user base and further driving users away from Meta-products.
And now that the corporation has shifted its focus to the Metaverse, it is clear that, in its eagerness to improve its image, it fired the launch gun too early. You're fighting a lost battle when you announce an idea and then claim it won't happen for 10-15 years. When the idea is still years away from becoming a reality, the public is already starting to lose interest.
So, as I questioned earlier, is it the beginning of a technological revolution that will take this firm to stratospheric growth and success, or are we witnessing the end of Meta and Zuckerberg himself?

Joseph Mavericks
3 years ago
You Don't Have to Spend $250 on TikTok Ads Because I Did
900K impressions, 8K clicks, and $$$ orders…
I recently started dropshipping. Now that I own my business and can charge it as a business expense, it feels less like money wasted if it doesn't work. I also made t-shirts to sell. I intended to open a t-shirt store and had many designs on a hard drive. I read that Tiktok advertising had a high conversion rate and low cost because they were new. According to many, the advertising' cost/efficiency ratio would plummet and become as bad as Google or Facebook Ads. Now felt like the moment to try Tiktok marketing and dropshipping. I work in marketing for a SaaS firm and have seen how poorly ads perform. I wanted to try it alone.
I set up $250 and ran advertising for a week. Before that, I made my own products, store, and marketing. In this post, I'll show you my process and results.
Setting up the store
Dropshipping is a sort of retail business in which the manufacturer ships the product directly to the client through an online platform maintained by a seller. The seller takes orders but has no stock. The manufacturer handles all orders. This no-stock concept increases profitability and flexibility.
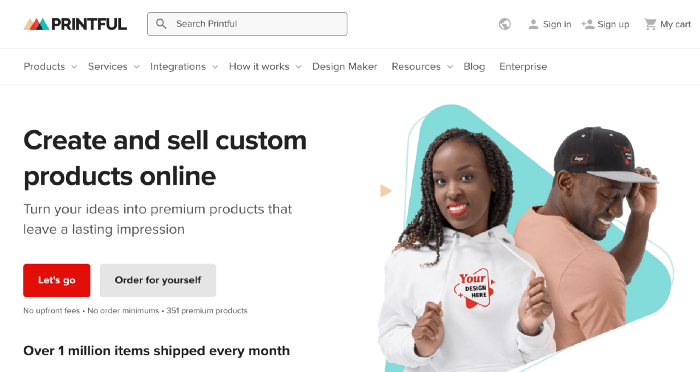
In my situation, I used previous t-shirt designs to make my own product. I didn't want to handle order fulfillment logistics, so I looked for a way to print my designs on demand, ship them, and handle order tracking/returns automatically. So I found Printful.
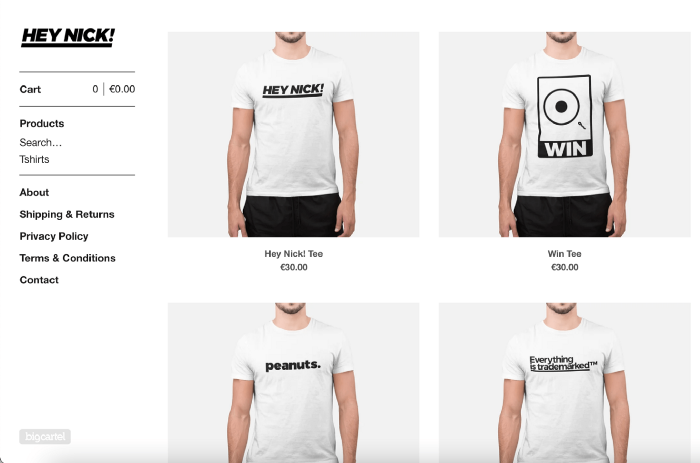
I needed to connect my backend and supplier to a storefront so visitors could buy. 99% of dropshippers use Shopify, but I didn't want to master the difficult application. I wanted a one-day project. I'd previously worked with Big Cartel, so I chose them.
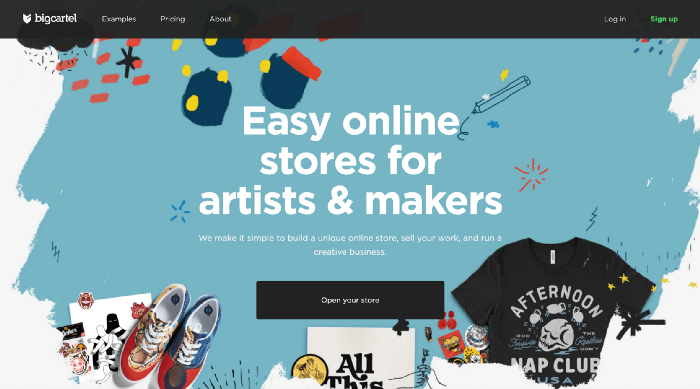
Big Cartel doesn't collect commissions on sales, simply a monthly flat price ($9.99 to $19.99 depending on your plan).
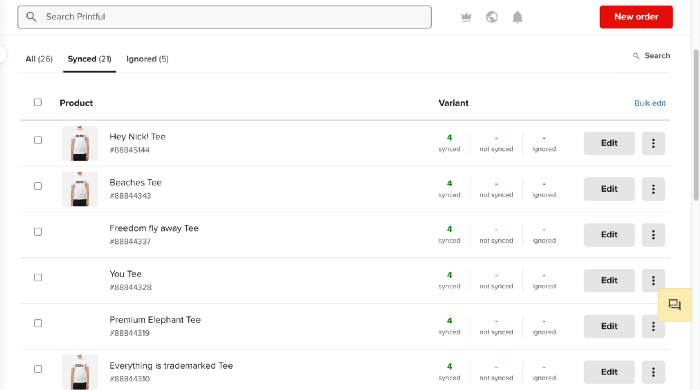
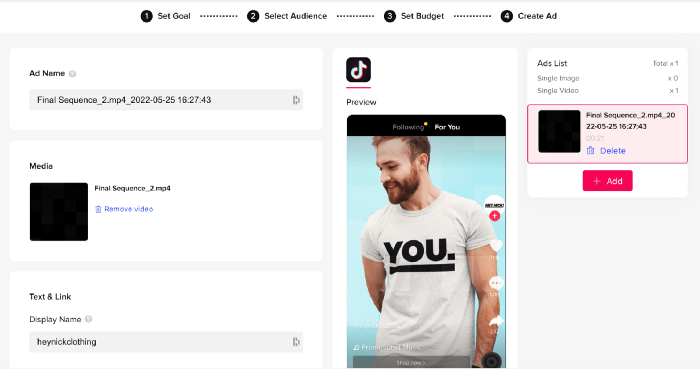
After opening a Big Cartel account, I uploaded 21 designs and product shots, then synced each product with Printful.
Developing the ads
I mocked up my designs on cool people photographs from placeit.net, a great tool for creating product visuals when you don't have a studio, camera gear, or models to wear your t-shirts.
I opened an account on the website and had advertising visuals within 2 hours.
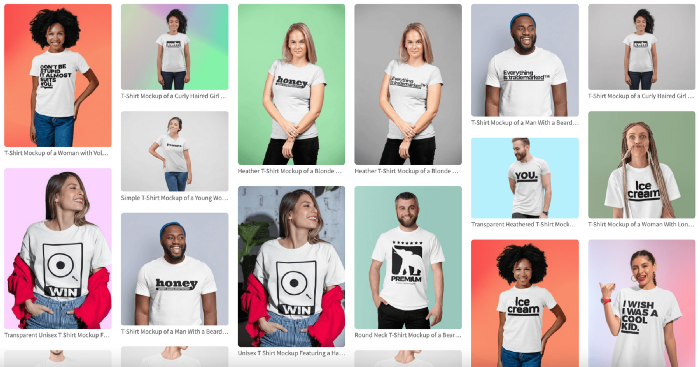
Because my designs are simple (black design on white t-shirt), I chose happy, stylish people on plain-colored backdrops. After that, I had to develop an animated slideshow.
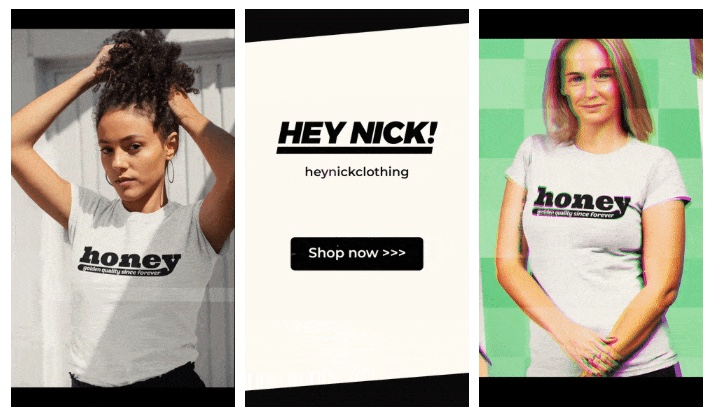
Because I'm a graphic designer, I chose to use Adobe Premiere to create animated Tiktok advertising.
Premiere is a fancy video editing application used for more than advertisements. Premiere is used to edit movies, not social media marketing. I wanted this experiment to be quick, so I got 3 social media ad templates from motionarray.com and threw my visuals in. All the transitions and animations were pre-made in the files, so it only took a few hours to compile. The result:
I downloaded 3 different soundtracks for the videos to determine which would convert best.
After that, I opened a Tiktok business account, uploaded my films, and inserted ad info. They went live within one hour.
The (poor) outcomes
As a European company, I couldn't deliver ads in the US. All of my advertisements' material (title, description, and call to action) was in English, hence they continued getting rejected in Europe for countries that didn't speak English. There are a lot of them:
I lost a lot of quality traffic, but I felt that if the images were engaging, people would check out the store and buy my t-shirts. I was wrong.
51,071 impressions on Day 1. 0 orders after 411 clicks
114,053 impressions on Day 2. 1.004 clicks and no orders
Day 3: 987 clicks, 103,685 impressions, and 0 orders
101,437 impressions on Day 4. 0 orders after 963 clicks
115,053 impressions on Day 5. 1,050 clicks and no purchases
125,799 impressions on day 6. 1,184 clicks, no purchases
115,547 impressions on Day 7. 1,050 clicks and no purchases
121,456 impressions on day 8. 1,083 clicks, no purchases
47,586 impressions on Day 9. 419 Clicks. No orders
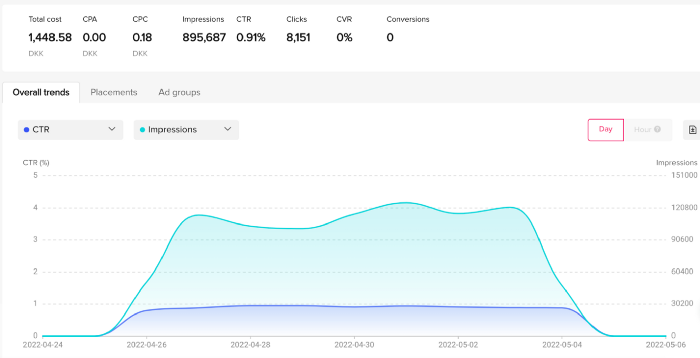
My overall conversion rate for video advertisements was 0.9%. TikTok's paid ad formats all result in strong engagement rates (ads average 3% to 12% CTR to site), therefore a 1 to 2% CTR should have been doable.
My one-week experiment yielded 8,151 ad clicks but no sales. Even if 0.1% of those clicks converted, I should have made 8 sales. Even companies with horrible web marketing would get one download or trial sign-up for every 8,151 clicks. I knew that because my advertising were in English, I had no impressions in the main EU markets (France, Spain, Italy, Germany), and that this impacted my conversion potential. I still couldn't believe my numbers.
I dug into the statistics and found that Tiktok's stats didn't match my store traffic data.
Looking more closely at the numbers
My ads were approved on April 26 but didn't appear until April 27. My store dashboard showed 440 visitors but 1,004 clicks on Tiktok. This happens often while tracking campaign results since different platforms handle comparable user activities (click, view) differently. In online marketing, residual data won't always match across tools.
My data gap was too large. Even if half of the 1,004 persons who clicked closed their browser or left before the store site loaded, I would have gained 502 visitors. The significant difference between Tiktok clicks and Big Cartel store visits made me suspicious. It happened all week:
Day 1: 440 store visits and 1004 ad clicks
Day 2: 482 store visits, 987 ad clicks
3rd day: 963 hits on ads, 452 store visits
443 store visits and 1,050 ad clicks on day 4.
Day 5: 459 store visits and 1,184 ad clicks
Day 6: 430 store visits and 1,050 ad clicks
Day 7: 409 store visits and 1,031 ad clicks
Day 8: 166 store visits and 418 ad clicks
The disparity wasn't related to residual data or data processing. The disparity between visits and clicks looked regular, but I couldn't explain it.
After the campaign concluded, I discovered all my creative assets (the videos) had a 0% CTR and a $0 expenditure in a separate dashboard. Whether it's a dashboard reporting issue or a budget allocation bug, online marketers shouldn't see this.

Tiktok can present any stats they want on their dashboard, just like any other platform that runs advertisements to promote content to its users. I can't verify that 895,687 individuals saw and clicked on my ad. I invested $200 for what appears to be around 900K impressions, which is an excellent ROI. No one bought a t-shirt, even an unattractive one, out of 900K people?
Would I do it again?
Nope. Whether I didn't make sales because Tiktok inflated the dashboard numbers or because I'm horrible at producing advertising and items that sell, I’ll stick to writing content and making videos. If setting up a business and ads in a few days was all it took to make money online, everyone would do it.
Video advertisements and dropshipping aren't dead. As long as the internet exists, people will click ads and buy stuff. Converting ads and selling stuff takes a lot of work, and I want to focus on other things.
I had always wanted to try dropshipping and I’m happy I did, I just won’t stick to it because that’s not something I’m interested in getting better at.
If I want to sell t-shirts again, I'll avoid Tiktok advertisements and find another route.