

More on Technology

Farhad Malik
3 years ago
How This Python Script Makes Me Money Every Day
Starting a passive income stream with data science and programming
My website is fresh. But how do I monetize it?
Creating a passive-income website is difficult. Advertise first. But what useful are ads without traffic?
Let’s Generate Traffic And Put Our Programming Skills To Use
SEO boosts traffic (Search Engine Optimisation). Traffic generation is complex. Keywords matter more than text, URL, photos, etc.
My Python skills helped here. I wanted to find relevant, Google-trending keywords (tags) for my topic.
First The Code
I wrote the script below here.
import re
from string import punctuation

import nltk
from nltk import TreebankWordTokenizer, sent_tokenize
from nltk.corpus import stopwords


class KeywordsGenerator:
    def __init__(self, pytrends):
        self._pytrends = pytrends

    def generate_tags(self, file_path, top_words=30):
        file_text = self._get_file_contents(file_path)
        clean_text = self._remove_noise(file_text)
        top_words = self._get_top_words(clean_text, top_words)
        suggestions = []
        for top_word in top_words:
            suggestions.extend(self.get_suggestions(top_word))
        suggestions.extend(top_words)
        tags = self._clean_tokens(suggestions)
        return ",".join(list(set(tags)))

    def _remove_noise(self, text):
        #1. Convert Text To Lowercase and remove numbers
        lower_case_text = str.lower(text)
        just_text = re.sub(r'\d+', '', lower_case_text)
        #2. Tokenise Paragraphs To words
        list = sent_tokenize(just_text)
        tokenizer = TreebankWordTokenizer()
        tokens = tokenizer.tokenize(just_text)
        #3. Clean text
        clean = self._clean_tokens(tokens)
        return clean

    def _clean_tokens(self, tokens):
        clean_words = [w for w in tokens if w not in punctuation]
        stopwords_to_remove = stopwords.words('english')
        clean = [w for w in clean_words if w not in stopwords_to_remove and not w.isnumeric()]
        return clean

    def get_suggestions(self, keyword):
        print(f'Searching pytrends for {keyword}')
        result = []
        self._pytrends.build_payload([keyword], cat=0, timeframe='today 12-m')
        data = self._pytrends.related_queries()[keyword]['top']
        if data is None or data.values is None:
            return result
        result.extend([x[0] for x in data.values.tolist()][:2])
        return result

    def _get_file_contents(self, file_path):
        return open(file_path, "r", encoding='utf-8',errors='ignore').read()

    def _get_top_words(self, words, top):
        counts = dict()

        for word in words:
            if word in counts:
                counts[word] += 1
            else:
                counts[word] = 1

        return list({k: v for k, v in sorted(counts.items(), key=lambda item: item[1])}.keys())[:top]


if __name__ == "1__main__":
    from pytrends.request import TrendReq

    nltk.download('punkt')
    nltk.download('stopwords')
    pytrends = TrendReq(hl='en-GB', tz=360)
    tags = KeywordsGenerator(pytrends)\
              .generate_tags('text_file.txt')
    print(tags)
Then The Dependencies
This script requires:
nltk==3.7
pytrends==4.8.0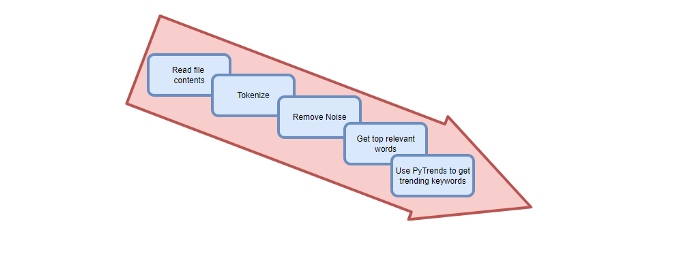
Analysis of the Script
I copy and paste my article into text file.txt, and the code returns the keywords as a comma-separated string.
To achieve this:
A class I made is called KeywordsGenerator.
This class has a function:
generate_tagsThe function
generate_tagsperforms the following tasks:
retrieves text file contents
uses NLP to clean the text by tokenizing sentences into words, removing punctuation, and other elements.
identifies the most frequent words that are relevant.
The
pytrendsAPI is then used to retrieve related phrases that are trending for each word from Google.finally adds a comma to the end of the word list.
4. I then use the keywords and paste them into the SEO area of my website.
These terms are trending on Google and relevant to my topic. My site's rankings and traffic have improved since I added new keywords. This little script puts our knowledge to work. I shared the script in case anyone faces similar issues.
I hope it helps readers sell their work.

The Mystique
3 years ago
Four Shocking Dark Web Incidents that Should Make You Avoid It
Dark Web activity? Is it as horrible as they say?

We peruse our phones for hours. Internet has improved our worldview.
However, the world's harshest realities remain buried on the internet and unattainable by everyone.
Browsers cannot access the Dark Web. Browse it with high-security authentication and exclusive access. There are compelling reasons to avoid the dark web at all costs.
1. The Dark Web and I

Darius wrote My Dark Web Story on reddit two years ago. The user claimed to have shared his dark web experience. DaRealEddyYT wanted to surf the dark web after hearing several stories.
He curiously downloaded Tor Browser, which provides anonymity and security.
In the Dark Room, bound
As Darius logged in, a text popped up: “Want a surprise? Click on this link.”
The link opened to a room with a chair. Only one light source illuminated the room. The chair held a female tied.
As the screen read "Let the game begin," a man entered the room and was paid in bitcoins to torment the girl.
The man dragged and tortured the woman.
A danger to safety
Leaving so soon, Darius, disgusted Darius tried to leave the stream. The anonymous user then sent Darius his personal information, including his address, which frightened him because he didn't know Tor was insecure.
After deleting the app, his phone camera was compromised.
He also stated that he left his residence and returned to find it unlocked and a letter saying, Thought we wouldn't find you? Reddit never updated the story.
The story may have been a fake, but a much scarier true story about the dark side of the internet exists.
2. The Silk Road Market
The dark web is restricted for a reason. The dark web has everything illicit imaginable. It's awful central.
The dark web has everything, from organ sales to drug trafficking to money laundering to human trafficking. Illegal drugs, pirated software, credit card, bank, and personal information can be found in seconds.
The dark web has reserved websites like Google. The Silk Road Website, which operated from 2011 to 2013, was a leading digital black market.
The FBI grew obsessed with site founder and processor Ross William Ulbricht.
The site became a criminal organization as money laundering and black enterprises increased. Bitcoin was utilized for credit card payment.
The FBI was close to arresting the site's administrator. Ross was detained after the agency closed Silk Road in 2013.
Two years later, in 2015, he was convicted and sentenced to two consecutive life terms and forty years. He appealed in 2016 but was denied, thus he is currently serving time.
The hefty sentence was for more than running a black marketing site. He was also convicted of murder-for-hire, earning about $730,000 in a short time.
3. Person-buying auctions
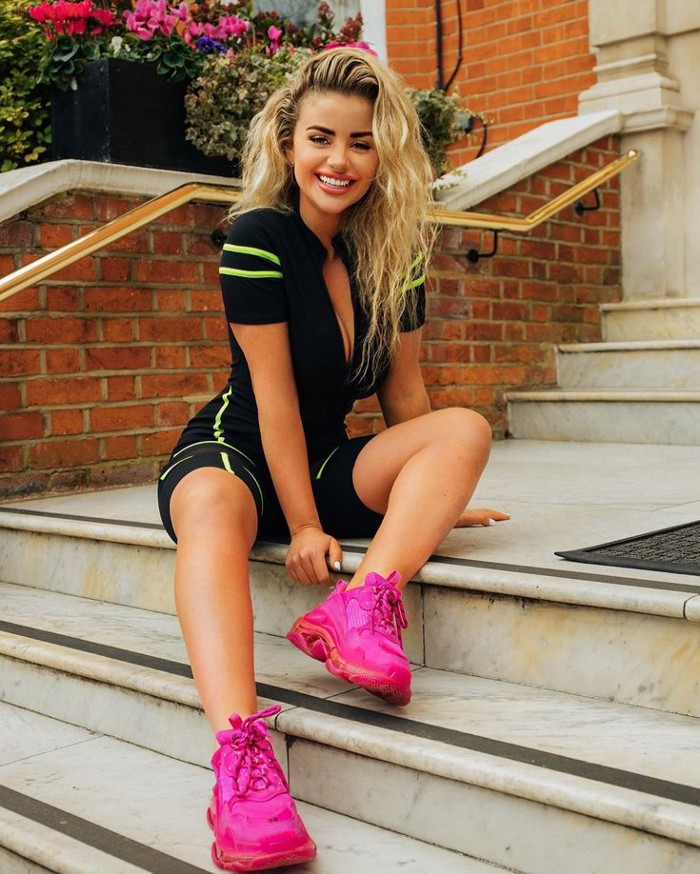
Bidding on individuals is another weird internet activity. After a Milan photo shoot, 20-year-old British model Chloe Ayling was kidnapped.
An ad agency in Milan made a bogus offer to shoot with the mother of a two-year-old boy. Four men gave her anesthetic and put her in a duffel bag when she arrived.
She was held captive for several days, and her images and $300,000 price were posted on the dark web. Black Death Trafficking Group kidnapped her to sell her for sex.
She was told two black death foot warriors abducted her. The captors released her when they found she was a mother because mothers were less desirable to sex slave buyers.
In July 2018, Lukasz Pawel Herba was arrested and sentenced to 16 years and nine months in prison. Being a young mother saved Chloe from creepy bidding.
However, it exceeds expectations of how many more would be in such danger daily without their knowledge.
4. Organ sales

Many are unaware of dark web organ sales. Patients who cannot acquire organs often turn to dark web brokers.
Brokers handle all transactions between donors and customers.
Bitcoins are used for dark web transactions, and the Tor server permits personal data on the web.
The WHO reports approximately 10,000 unlawful organ transplants annually. The black web sells kidneys, hearts, even eyes.
To protect our lives and privacy, we should manage our curiosity and never look up dangerous stuff.
While it's fascinating and appealing to know what's going on in the world we don't know about, it's best to prioritize our well-being because one never knows how bad it might get.
Sources

Paul DelSignore
2 years ago
The stunning new free AI image tool is called Leonardo AI.
Leonardo—The New Midjourney?
Users are comparing the new cowboy to Midjourney.
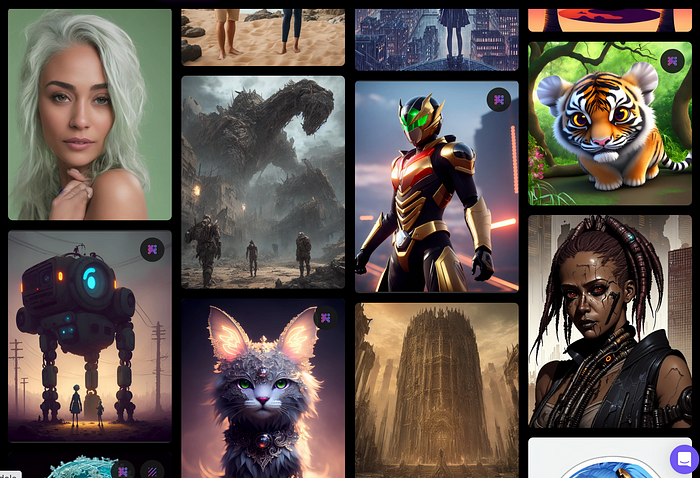
Leonardo.AI creates great photographs and has several unique capabilities I haven't seen in other AI image systems.
Midjourney's quality photographs are evident in the community feed.
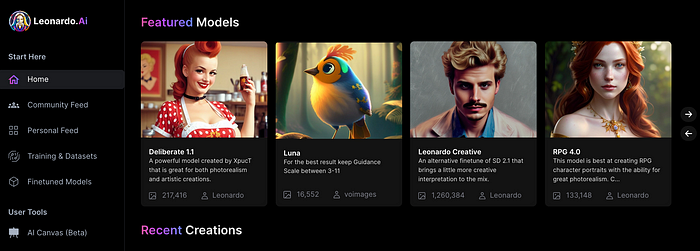
Create Pictures Using Models
You can make graphics using platform models when you first enter the app (website):
Luma, Leonardo creative, Deliberate 1.1.

Clicking a model displays its description and samples:
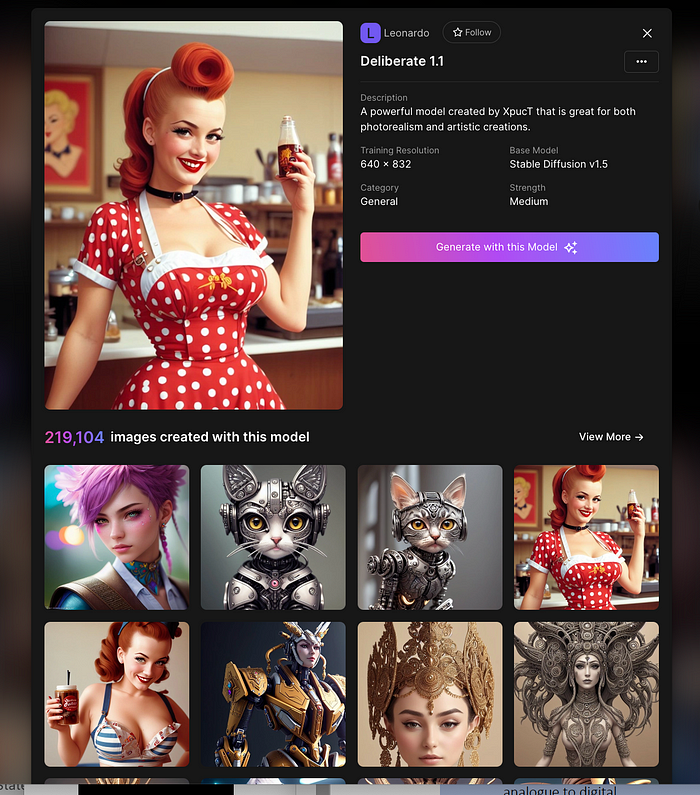
Click Generate With This Model.
Then you can add your prompt, alter models, photos, sizes, and guide scale in a sleek UI.

Changing Pictures
Leonardo's Canvas editor lets you change created images by hovering over them:

The editor opens with masking, erasing, and picture download.

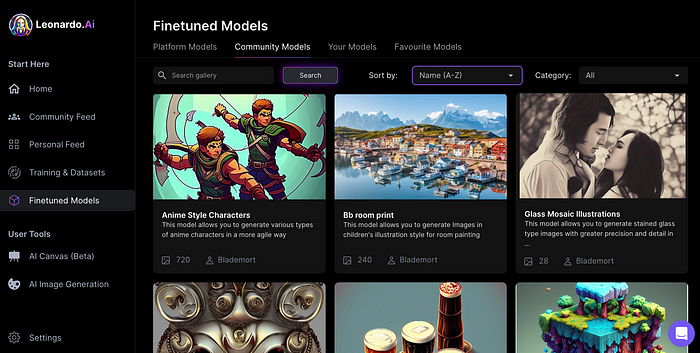
Develop Your Own Models
I've never seen anything like Leonardo's model training feature.
Upload a handful of similar photographs and save them as a model for future images. Share your model with the community.

You can make photos using your own model and a community-shared set of fine-tuned models:
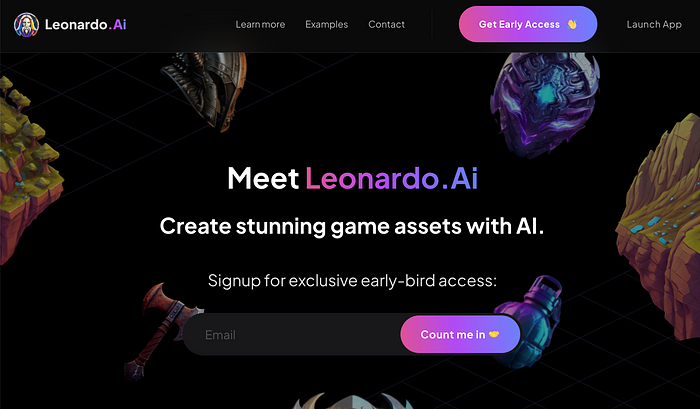
Obtain Leonardo access
Leonardo is currently free.
Visit Leonardo.ai and click "Get Early Access" to receive access.
Add your email to receive a link to join the discord channel. Simply describe yourself and fill out a form to join the discord channel.
Please go to 👑│introductions to make an introduction and ✨│priority-early-access will be unlocked, you must fill out a form and in 24 hours or a little more (due to demand), the invitation will be sent to you by email.
I got access in two hours, so hopefully you can too.
Last Words
I know there are many AI generative platforms, some free and some expensive, but Midjourney produces the most artistically stunning images and art.
Leonardo is the closest I've seen to Midjourney, but Midjourney is still the leader.
It's free now.
Leonardo's fine-tuned model selections, model creation, image manipulation, and output speed and quality make it a great AI image toolbox addition.
You might also like

Chris Newman
3 years ago
Clean Food: Get Over Yourself If You Want to Save the World.

I’m a permaculture farmer. I want to create food-producing ecosystems. My hope is a world with easy access to a cuisine that nourishes consumers, supports producers, and leaves the Earth joyously habitable.
Permaculturists, natural farmers, plantsmen, and foodies share this ambition. I believe this group of green thumbs, stock-folk, and food champions is falling to tribalism, forgetting that rescuing the globe requires saving all of its inhabitants, even those who adore cheap burgers and Coke. We're digging foxholes and turning folks who disagree with us or don't understand into monsters.
Take Dr. Daphne Miller's comments at the end of her Slow Money Journal interview:
“Americans are going to fall into two camps when all is said and done: People who buy cheap goods, regardless of quality, versus people who are willing and able to pay for things that are made with integrity. We are seeing the limits of the “buying cheap crap” approach.”
This is one of the most judgmental things I've read outside the Bible. Consequences:
People who purchase inexpensive things (food) are ignorant buffoons who prefer to choose fair trade coffee over fuel as long as the price is correct.
It all depends on your WILL to buy quality or cheaply. Both those who are WILLING and those who ARE NOT exist. And able, too.
People who are unwilling and unable are purchasing garbage. You're giving your kids bad food. Both the Earth and you are being destroyed by your actions. Your camp is the wrong one. You’re garbage! Disgrace to you.
Dr. Miller didn't say it, but words are worthless until interpreted. This interpretation depends on the interpreter's economic, racial, political, religious, family, and personal history. Complementary language insults another. Imagine how that Brown/Harvard M.D.'s comment sounds to a low-income household with no savings.
Dr. Miller's comment reflects the echo chamber into which nearly all clean food advocates speak. It asks easy questions and accepts non-solutions like raising food prices and eating less meat. People like me have cultivated an insular world unencumbered by challenges beyond the margins. We may disagree about technical details in rotationally-grazing livestock, but we short circuit when asked how our system could supply half the global beef demand. Most people have never seriously considered this question. We're so loved and affirmed that challenging ourselves doesn't seem necessary. Were generals insisting we don't need to study the terrain because God is on our side?
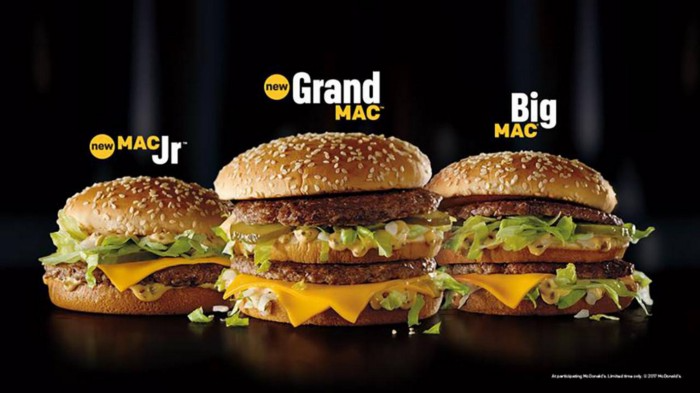
“Yes, the $8/lb ground beef is produced the way it should be. Yes, it’s good for my body. Yes it’s good for the Earth. But it’s eight freaking dollars, and my kid needs braces and protein. Bye Felicia, we’re going to McDonald’s.”
-Bobby Q. Homemaker
Funny clean foodies. People don't pay enough for food; they should value it more. Turn the concept of buying food with integrity into a wedge and drive it into the heart of America, dividing the willing and unwilling.
We go apeshit if you call our products high-end.
I've heard all sorts of gaslighting to defend a $10/lb pork chop as accessible (things I’ve definitely said in the past):
At Whole Foods, it costs more.
The steak at the supermarket is overly affordable.
Pay me immediately or the doctor gets paid later.
I spoke with Timbercreek Market and Local Food Hub in front of 60 people. We were asked about local food availability.
They came to me last, after my co-panelists gave the same responses I would have given two years before.
I grumbled, "Our food is inaccessible." Nope. It's beyond the wallets of nearly everyone, and it's the biggest problem with sustainable food systems. We're criminally unserious about being leaders in sustainability until we propose solutions beyond economic relativism, wishful thinking, and insisting that vulnerable, distracted people do all the heavy lifting of finding a way to afford our food. And until we talk about solutions, all this preserve the world? False.
The room fell silent as if I'd revealed a terrible secret. Long, thunderous applause followed my other remarks. But I’m probably not getting invited back to any VNRLI events.
I make pricey cuisine. It’s high-end. I have customers who really have to stretch to get it, and they let me know it. They're forgoing other creature comforts to help me make a living and keep the Earth of my grandmothers alive, and they're doing it as an act of love. They believe in us and our work.
I remember it when I'm up to my shoulders in frigid water, when my vehicle stinks of four types of shit, when I come home covered in blood and mud, when I'm hauling water in 100-degree heat, when I'm herding pigs in a rainstorm and dodging lightning bolts to close the chickens. I'm reminded I'm not alone. Their enthusiasm is worth more than money; it helps me make a life and a living. I won't label that gift less than it is to make my meal seem more accessible.
Not everyone can sacrifice.
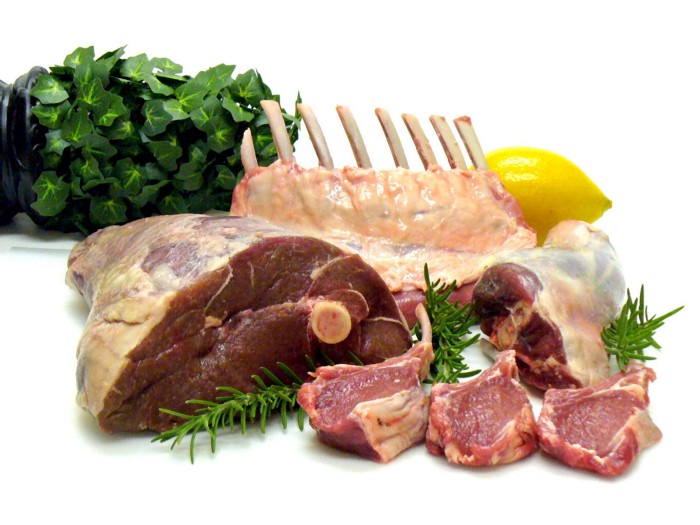
Let's not pretend we want to go back to peasant fare, despite our nostalgia. Industrial food has leveled what rich and poor eat. How food is cooked will be the largest difference between what you and a billionaire eat. Rich and poor have access to chicken, pork, and beef. You might be shocked how recently that wasn't the case. This abundance, particularly of animal protein, has helped vulnerable individuals.
Industrial food causes environmental damage, chronic disease, and distribution inequities. Clean food promotes non-industrial, artisan farming. This creates a higher-quality, more expensive product than the competition; we respond with aggressive marketing and the "people need to value food more" shtick geared at consumers who can spend the extra money.
The guy who is NOT able is rendered invisible by clean food's elitist marketing, which is bizarre given a.) clean food insists it's trying to save the world, yet b.) MOST PEOPLE IN THE WORLD ARE THAT GUY. No one can help him except feel-good charities. That's crazy.
Also wrong: a foodie telling a kid he can't eat a 99-cent fast food hamburger because it lacks integrity. Telling him how easy it is to save his ducketts and maybe have a grass-fed house burger at the end of the month as a reward, but in the meantime get your protein from canned beans you can't bake because you don't have a stove and, even if you did, your mom works two jobs and moonlights as an Uber driver so she doesn't have time to heat that shitup anyway.
A wealthy person's attitude toward the poor is indecent. It's 18th-century Versailles.

Human rights include access to nutritious food without social or environmental costs. As a food-forest-loving permaculture farmer, I no longer balk at the concept of cultured beef and hydroponics. My food is out of reach for many people, but access to decent food shouldn't be. Cultures and hydroponics could scale to meet the clean food affordability gap without externalities. If technology can deliver great, affordable beef without environmental negative effects, I can't reject it because it's new, unusual, or might endanger my business.
Why is your farm needed if cultured beef and hydroponics can feed the world? Permaculture food forests with trees, perennial plants, and animals are crucial to economically successful environmental protection. No matter how advanced technology gets, we still need clean air, water, soil, greenspace, and food.
Clean Food cultivated in/on live soil, minimally processed, and eaten close to harvest is part of the answer, not THE solution. Clean food advocates must recognize the conflicts at the intersection of environmental, social, and economic sustainability, the disproportionate effects of those conflicts on the poor and lower-middle classes, and the immorality and impracticality of insisting vulnerable people address those conflicts on their own and judging them if they don't.
Our clients, relatives, friends, and communities need an honest assessment of our role in a sustainable future. If we're serious about preserving the world, we owe honesty to non-customers. We owe our goal and sanity to honesty. Future health and happiness of the world left to the average person's pocketbook and long-term moral considerations is a dismal proposition with few parallels.
Let's make soil and grow food. Let the lab folks do their thing. We're all interdependent.

Dr. Linda Dahl
3 years ago
We eat corn in almost everything. Is It Important?
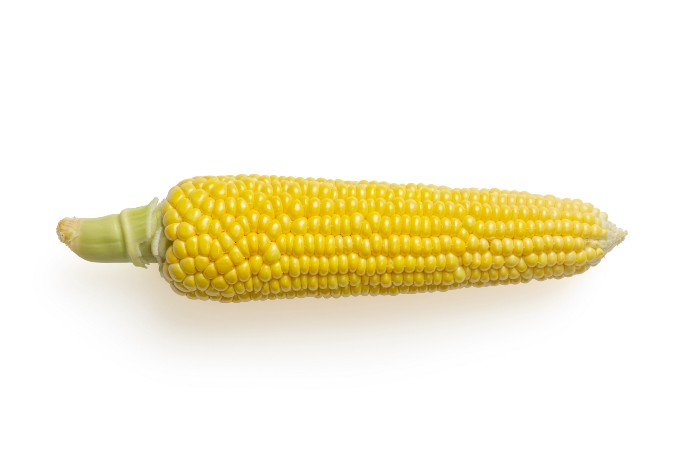
Corn Kid got viral on TikTok after being interviewed by Recess Therapy. Tariq, called the Corn Kid, ate a buttery ear of corn in the video. He's corn crazy. He thinks everyone just has to try it. It turns out, whether we know it or not, we already have.
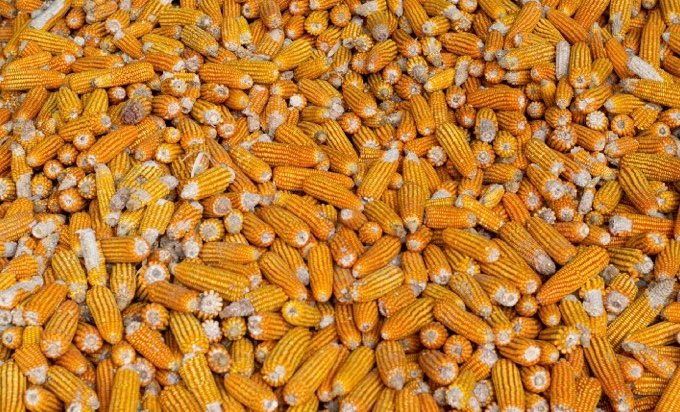
Corn is a fruit, veggie, and grain. It's the second-most-grown crop. Corn makes up 36% of U.S. exports. In the U.S., it's easy to grow and provides high yields, as proven by the vast corn belt spanning the Midwest, Great Plains, and Texas panhandle. Since 1950, the corn crop has doubled to 10 billion bushels.
You say, "Fine." We shouldn't just grow because we can. Why so much corn? What's this corn for?
Why is practical and political. Michael Pollan's The Omnivore's Dilemma has the full narrative. Early 1970s food costs increased. Nixon subsidized maize to feed the public. Monsanto genetically engineered corn seeds to make them hardier, and soon there was plenty of corn. Everyone ate. Woot! Too much corn followed. The powers-that-be had to decide what to do with leftover corn-on-the-cob.
They are fortunate that corn has a wide range of uses.
First, the edible variants. I divide corn into obvious and stealth.
Obvious corn includes popcorn, canned corn, and corn on the cob. This form isn't always digested and often comes out as entire, polka-dotting poop. Cornmeal can be ground to make cornbread, polenta, and corn tortillas. Corn provides antioxidants, minerals, and vitamins in moderation. Most synthetic Vitamin C comes from GMO maize.
Corn oil, corn starch, dextrose (a sugar), and high-fructose corn syrup are often overlooked. They're stealth corn because they sneak into practically everything. Corn oil is used for frying, baking, and in potato chips, mayonnaise, margarine, and salad dressing. Baby food, bread, cakes, antibiotics, canned vegetables, beverages, and even dairy and animal products include corn starch. Dextrose appears in almost all prepared foods, excluding those with high-fructose corn syrup. HFCS isn't as easily digested as sucrose (from cane sugar). It can also cause other ailments, which we'll discuss later.
Most foods contain corn. It's fed to almost all food animals. 96% of U.S. animal feed is corn. 39% of U.S. corn is fed to livestock. But animals prefer other foods. Omnivore chickens prefer insects, worms, grains, and grasses. Captive cows are fed a total mixed ration, which contains corn. These animals' products, like eggs and milk, are also corn-fed.
There are numerous non-edible by-products of corn that are employed in the production of items like:
fuel-grade ethanol
plastics
batteries
cosmetics
meds/vitamins binder
carpets, fabrics
glutathione
crayons
Paint/glue
How does corn influence you? Consider quick food for dinner. You order a cheeseburger, fries, and big Coke at the counter (or drive-through in the suburbs). You tell yourself, "No corn." All that contains corn. Deconstruct:
Cows fed corn produce meat and cheese. Meat and cheese were bonded with corn syrup and starch (same). The bun (corn flour and dextrose) and fries were fried in maize oil. High fructose corn syrup sweetens the drink and helps make the cup and straw.
Just about everything contains corn. Then what? A cornspiracy, perhaps? Is eating too much maize an issue, or should we strive to stay away from it whenever possible?
As I've said, eating some maize can be healthy. 92% of U.S. corn is genetically modified, according to the Center for Food Safety. The adjustments are expected to boost corn yields. Some sweet corn is genetically modified to produce its own insecticide, a protein deadly to insects made by Bacillus thuringiensis. It's safe to eat in sweet corn. Concerns exist about feeding agricultural animals so much maize, modified or not.
High fructose corn syrup should be consumed in moderation. Fructose, a sugar, isn't easily metabolized. Fructose causes diabetes, fatty liver, obesity, and heart disease. It causes inflammation, which might aggravate gout. Candy, packaged sweets, soda, fast food, juice drinks, ice cream, ice cream topping syrups, sauces & condiments, jams, bread, crackers, and pancake syrup contain the most high fructose corn syrup. Everyday foods with little nutrients. Check labels and choose cane sugar or sucrose-sweetened goods. Or, eat corn like the Corn Kid.

Adam Frank
3 years ago
Humanity is not even a Type 1 civilization. What might a Type 3 be capable of?
The Kardashev scale grades civilizations from Type 1 to Type 3 based on energy harvesting.
How do technologically proficient civilizations emerge across timescales measuring in the tens of thousands or even millions of years? This is a question that worries me as a researcher in the search for “technosignatures” from other civilizations on other worlds. Since it is already established that longer-lived civilizations are the ones we are most likely to detect, knowing something about their prospective evolutionary trajectories could be translated into improved search tactics. But even more than knowing what to seek for, what I really want to know is what happens to a society after so long time. What are they capable of? What do they become?
This was the question Russian SETI pioneer Nikolai Kardashev asked himself back in 1964. His answer was the now-famous “Kardashev Scale.” Kardashev was the first, although not the last, scientist to try and define the processes (or stages) of the evolution of civilizations. Today, I want to launch a series on this question. It is crucial to technosignature studies (of which our NASA team is hard at work), and it is also important for comprehending what might lay ahead for mankind if we manage to get through the bottlenecks we have now.
The Kardashev scale
Kardashev’s question can be expressed another way. What milestones in a civilization’s advancement up the ladder of technical complexity will be universal? The main notion here is that all (or at least most) civilizations will pass through some kind of definable stages as they progress, and some of these steps might be mirrored in how we could identify them. But, while Kardashev’s major focus was identifying signals from exo-civilizations, his scale gave us a clear way to think about their evolution.
The classification scheme Kardashev employed was not based on social systems of ethics because they are something that we can probably never predict about alien cultures. Instead, it was built on energy, which is something near and dear to the heart of everybody trained in physics. Energy use might offer the basis for universal stages of civilisation progression because you cannot do the work of establishing a civilization without consuming energy. So, Kardashev looked at what energy sources were accessible to civilizations as they evolved technologically and used those to build his scale.
From Kardashev’s perspective, there are three primary levels or “types” of advancement in terms of harvesting energy through which a civilization should progress.
Type 1: Civilizations that can capture all the energy resources of their native planet constitute the first stage. This would imply capturing all the light energy that falls on a world from its host star. This makes it reasonable, given solar energy will be the largest source available on most planets where life could form. For example, Earth absorbs hundreds of atomic bombs’ worth of energy from the Sun every second. That is a rather formidable energy source, and a Type 1 race would have all this power at their disposal for civilization construction.
Type 2: These civilizations can extract the whole energy resources of their home star. Nobel Prize-winning scientist Freeman Dyson famously anticipated Kardashev’s thinking on this when he imagined an advanced civilization erecting a large sphere around its star. This “Dyson Sphere” would be a machine the size of the complete solar system for gathering stellar photons and their energy.
Type 3: These super-civilizations could use all the energy produced by all the stars in their home galaxy. A normal galaxy has a few hundred billion stars, so that is a whole lot of energy. One way this may be done is if the civilization covered every star in their galaxy with Dyson spheres, but there could also be more inventive approaches.
Implications of the Kardashev scale
Climbing from Type 1 upward, we travel from the imaginable to the god-like. For example, it is not hard to envisage utilizing lots of big satellites in space to gather solar energy and then beaming that energy down to Earth via microwaves. That would get us to a Type 1 civilization. But creating a Dyson sphere would require chewing up whole planets. How long until we obtain that level of power? How would we have to change to get there? And once we get to Type 3 civilizations, we are virtually thinking about gods with the potential to engineer the entire cosmos.
For me, this is part of the point of the Kardashev scale. Its application for thinking about identifying technosignatures is crucial, but even more strong is its capacity to help us shape our imaginations. The mind might become blank staring across hundreds or thousands of millennia, and so we need tools and guides to focus our attention. That may be the only way to see what life might become — what we might become — once it arises to start out beyond the boundaries of space and time and potential.
This is a summary. Read the full article here.